nacos环境搭建
首先要看的是官方文档:https://nacos.io/zh-cn/docs/quick-start.html
按里面的git地址和maven命令,用
sh startup.sh -m standalone
把服务器开启:
浏览器进入http://127.0.0.1:8848/nacos/,用户名与密码是nacos/nacos
启动我下面将给出的provider与consumer项目,在nacos控制台可以看到如下列表:

再从浏览器键入地址:http://localhost:8080/echo/highersoft
可以看到provider返回的字符串。
下面是代码,非常简单,每个项目三个文件(pom.xml,bootstrap.properties,Application.java).
一 provider
pom.xml
<project xmlns="http://maven.apache.org/POM/4.0.0" xmlns:xsi="http://www.w3.org/2001/XMLSchema-instance" xsi:schemalocation="http://maven.apache.org/POM/4.0.0 http://maven.apache.org/xsd/maven-4.0.0.xsd">
	<modelVersion>4.0.0</modelVersion>
	<groupId>net.highersoft</groupId>
	<artifactId>spring-cloud-nacos-discovery-provider</artifactId>
	<version>0.0.1-SNAPSHOT</version>

	<properties>

		<!-- 文件拷贝时的编码 -->
		<project.build.sourceEncoding>UTF-8</project.build.sourceEncoding>
		<project.reporting.outputEncoding>UTF-8</project.reporting.outputEncoding>
		<!-- 编译时的编码 -->
		<maven.compiler.encoding>UTF-8</maven.compiler.encoding>

		<java.version>1.8</java.version>
		<maven.compiler.source>1.8</maven.compiler.source>
		<maven.compiler.target>1.8</maven.compiler.target>

	</properties>

	<parent>
		<groupId>org.springframework.boot</groupId>
		<artifactId>spring-boot-starter-parent</artifactId>
		<version>1.5.2.RELEASE</version>
		<relativePath/>

	</parent>

	<dependencies>
		<dependency>
		    <groupId>org.springframework.cloud</groupId>
		    <artifactId>spring-cloud-starter-alibaba-nacos-discovery</artifactId>
		    <version>0.1.2.RELEASE</version>
		</dependency>
		<dependency>
                <groupId>com.alibaba.nacos</groupId>
                <artifactId>nacos-client</artifactId>
                <version>1.1.0</version>
            </dependency>

		<!-- spring boot实现Java Web服务 -->
        <dependency>
            <groupId>org.springframework.boot</groupId>
            <artifactId>spring-boot-starter-web</artifactId>
        </dependency>

	</dependencies>


	<build>
		<plugins>
			<plugin>
				<groupId>org.springframework.boot</groupId>
				<artifactId>spring-boot-maven-plugin</artifactId>
			</plugin>
		</plugins>
	</build>

</project>
bootstrap.properties
server.port=8070
spring.application.name=service-provider
spring.cloud.nacos.discovery.server-addr=127.0.0.1:8848
NacosProviderApplication.java
package net.highersoft.springcloud.controller;

import org.springframework.boot.SpringApplication;
import org.springframework.boot.autoconfigure.SpringBootApplication;
import org.springframework.cloud.client.discovery.EnableDiscoveryClient;
import org.springframework.web.bind.annotation.PathVariable;
import org.springframework.web.bind.annotation.RequestMapping;
import org.springframework.web.bind.annotation.RequestMethod;
import org.springframework.web.bind.annotation.RestController;

@SpringBootApplication
@EnableDiscoveryClient
public class NacosProviderApplication {

	public static void main(String[] args) {
		SpringApplication.run(NacosProviderApplication.class, args);
	}

	@RestController
	class EchoController {
		@RequestMapping(value = "/echo/{string}", method = RequestMethod.GET)
		public String echo(@PathVariable String string) {
			return "Hello Nacos Discovery " + string;
		}
	}
}
二 consumer
pom.xml
<project xmlns="http://maven.apache.org/POM/4.0.0" xmlns:xsi="http://www.w3.org/2001/XMLSchema-instance" xsi:schemalocation="http://maven.apache.org/POM/4.0.0 http://maven.apache.org/xsd/maven-4.0.0.xsd">


	<modelVersion>4.0.0</modelVersion>
	<groupId>net.highersoft</groupId>
	<artifactId>spring-cloud-nacos-discovery-consumer</artifactId>
	<version>0.0.1-SNAPSHOT</version>

	<properties>
		<spring-boot.version>2.0.4.RELEASE</spring-boot.version>
		<spring-cloud.version>Finchley.RELEASE</spring-cloud.version>

		<maven.compiler.source>1.8</maven.compiler.source>
		<maven.compiler.target>1.8</maven.compiler.target>

		<spring-cloud-openfeign.version>2.0.0.RELEASE</spring-cloud-openfeign.version>
		<spring-cloud-netflix.version>2.0.0.RELEASE</spring-cloud-netflix.version>
	</properties>
	<parent>
		<groupId>org.springframework.boot</groupId>
		<artifactId>spring-boot-starter-parent</artifactId>
		<version>1.5.2.RELEASE</version>
		<relativePath/>

	</parent>

	<dependencies>
		<dependency>
		    <groupId>org.springframework.cloud</groupId>
		    <artifactId>spring-cloud-starter-alibaba-nacos-discovery</artifactId>
		    <version>0.1.2.RELEASE</version>
		</dependency>
		<dependency>
                <groupId>com.alibaba.nacos</groupId>
                <artifactId>nacos-client</artifactId>
                <version>1.1.3</version>
            </dependency>

		<!-- spring boot实现Java Web服务 -->
        <dependency>
            <groupId>org.springframework.boot</groupId>
            <artifactId>spring-boot-starter-web</artifactId>
        </dependency>

	</dependencies>

	<build>
		<plugins>
			<plugin>
				<groupId>org.springframework.boot</groupId>
				<artifactId>spring-boot-maven-plugin</artifactId>
				<executions>
					<execution>
						<goals>
							<goal>repackage</goal>
						</goals>
					</execution>
				</executions>
			</plugin>
			<plugin>
				<artifactId>maven-compiler-plugin</artifactId>
				<configuration>
					<source>1.8</source>
					<target>1.8</target>
				</configuration>
			</plugin>
		</plugins>
	</build>
</project>
application.properties
server.port=8080
spring.application.name=service-consumer
#注意这里的key是spring.cloud.nacos.discovery.server-addr
spring.cloud.nacos.discovery.server-addr=127.0.0.1:8848
NacosConsumerApplication.java
package net.highersoft.springcloud;

import org.springframework.beans.factory.annotation.Autowired;
import org.springframework.boot.SpringApplication;
import org.springframework.boot.autoconfigure.SpringBootApplication;
import org.springframework.cloud.client.discovery.EnableDiscoveryClient;
import org.springframework.cloud.client.loadbalancer.LoadBalanced;
import org.springframework.context.annotation.Bean;
import org.springframework.web.bind.annotation.PathVariable;
import org.springframework.web.bind.annotation.RequestMapping;
import org.springframework.web.bind.annotation.RequestMethod;
import org.springframework.web.bind.annotation.RestController;
import org.springframework.web.client.RestTemplate;

@SpringBootApplication
@EnableDiscoveryClient
public class NacosConsumerApplication {

    @LoadBalanced
    @Bean
    public RestTemplate restTemplate() {
        return new RestTemplate();
    }

    public static void main(String[] args) {
        SpringApplication.run(NacosConsumerApplication.class, args);
    }

    @RestController
    public class TestController {

        private final RestTemplate restTemplate;

        @Autowired
        public TestController(RestTemplate restTemplate) {this.restTemplate = restTemplate;}

        @RequestMapping(value = "/echo/{str}", method = RequestMethod.GET)
        public String echo(@PathVariable String str) {
            return restTemplate.getForObject("http://service-provider/echo/" + str, String.class);
        }
    }
}
好了,基本的环境就是这样。
nacos在不断更新,不同的服务器对应了不同的版本,如果客户端版本与服务器版本不匹配,会有各种错误。2020-07-23经过错误尝试,探索出了一套目前最新的配置。
nacos服务器1.3.1,启动同上。
provider配置有变化,
pom.xml
<project xmlns="http://maven.apache.org/POM/4.0.0"
	xmlns:xsi="http://www.w3.org/2001/XMLSchema-instance"
	xsi:schemaLocation="http://maven.apache.org/POM/4.0.0 http://maven.apache.org/xsd/maven-4.0.0.xsd">
	<modelVersion>4.0.0</modelVersion>
	<groupId>net.highersoft</groupId>
	<artifactId>spring-cloud-nacos-discovery-provider</artifactId>
	<version>0.0.1-SNAPSHOT</version>

	<properties>

		<!-- 文件拷贝时的编码 -->
		<project.build.sourceEncoding>UTF-8</project.build.sourceEncoding>
		<project.reporting.outputEncoding>UTF-8</project.reporting.outputEncoding>
		<!-- 编译时的编码 -->
		<maven.compiler.encoding>UTF-8</maven.compiler.encoding>

		<java.version>1.8</java.version>
		<maven.compiler.source>1.8</maven.compiler.source>
		<maven.compiler.target>1.8</maven.compiler.target>

	</properties>

	<parent>
		<groupId>org.springframework.boot</groupId>
		<artifactId>spring-boot-starter-parent</artifactId>
		<version>2.2.0.RELEASE</version>
		<relativePath/>

	</parent>

	<dependencies>
		<dependency>
			<groupId>com.alibaba.cloud</groupId>
			<artifactId>spring-cloud-starter-alibaba-nacos-discovery</artifactId>
			<version>2.2.1.RELEASE</version>
		</dependency>
		<!-- 有了下面依赖才能开启配置中心 -->
		<dependency>
			<groupId>com.alibaba.cloud</groupId>
			<artifactId>spring-cloud-starter-alibaba-nacos-config</artifactId>
			<version>2.2.1.RELEASE</version>
		</dependency>


		<!-- spring boot实现Java Web服务 -->
		<dependency>
			<groupId>org.springframework.boot</groupId>
			<artifactId>spring-boot-starter-web</artifactId>
		</dependency>

	</dependencies>


	<build>
		<plugins>
			<plugin>
				<groupId>org.springframework.boot</groupId>
				<artifactId>spring-boot-maven-plugin</artifactId>
			</plugin>
		</plugins>
	</build>

</project>
bootstrap.yml:
server:
  port: 8070
spring:
  application:
    name: service-provider
  profiles:
    active: dev

  cloud:
    nacos:
      discovery:
        server-addr: 127.0.0.1:8848

      config:
        server-addr: 127.0.0.1:8848
        file-extension: yml
这里把nacos服务同时当成了配置中心,系统启动时会先读取bootstrap.yml会发现有配置中心的参数,那么就去服务器读取配置。所以在代码里可以读到配置中心中的值,如上配置就可以配置中心增加配置:
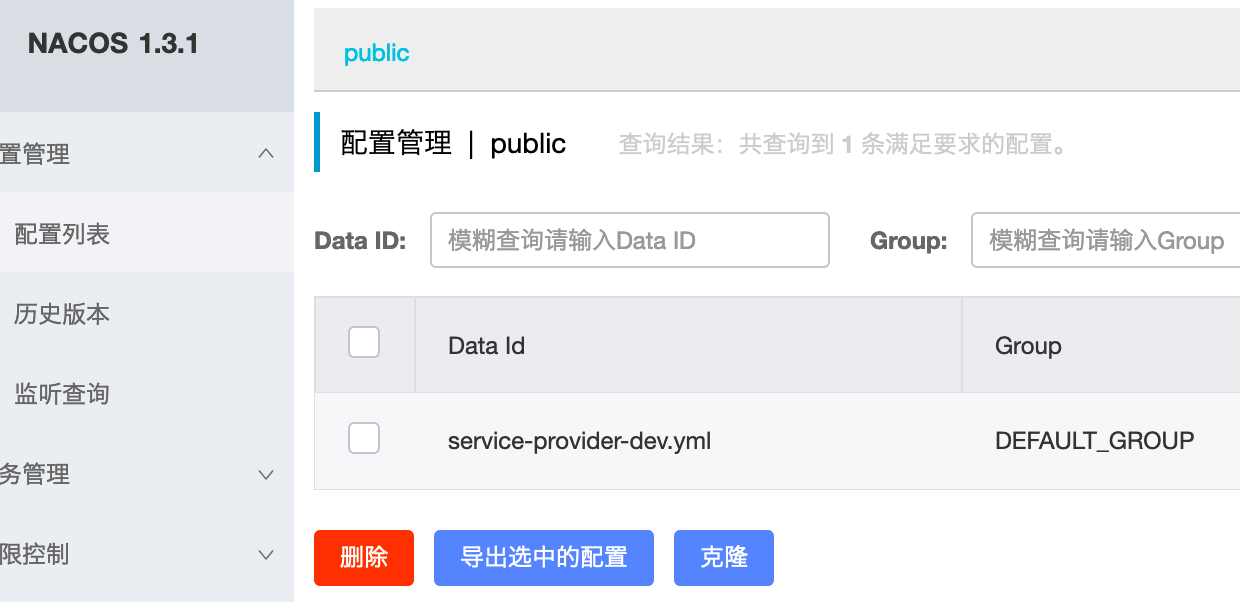
注意文件名${spring.application.name}-${spring.profiles.active}.yml具体的配置:
在代码中就可以配置这个变量了,如下:
@RestController
	@RefreshScope
	class EchoController {
		@Value("${config.val1}")
		private String val1;
		@RequestMapping(value = "/echo/{string}", method = RequestMethod.GET)
		public String echo(@PathVariable String string) {
			return "Hello Nacos Discovery " + string+" "+val1;
		}
	}
调用端还用1.5.2就能调通,那就不改了。如下:
<parent>
	<groupId>org.springframework.boot</groupId>
	<artifactId>spring-boot-starter-parent</artifactId>
	<version>1.5.2.RELEASE</version>
	<relativePath/>
</parent>

<dependencies>
	<dependency>
	    <groupId>org.springframework.cloud</groupId>
	    <artifactId>spring-cloud-starter-alibaba-nacos-discovery</artifactId>
	    <version>0.1.2.RELEASE</version>
	</dependency>
	<dependency>
            <groupId>com.alibaba.nacos</groupId>
            <artifactId>nacos-client</artifactId>
            <version>1.1.3</version>
        </dependency>

	<!-- spring boot实现Java Web服务 -->
    <dependency>
        <groupId>org.springframework.boot</groupId>
        <artifactId>spring-boot-starter-web</artifactId>
    </dependency>

</dependencies>
如何分namespace?
先在nacos上新建一个命名空间,再在provider和consumer上配置上namespace就行了。如:
provider:
server:
  port: 8070
spring:
  application:
    name: service-provider
  profiles:
    active: dev

  cloud:
    nacos:
      discovery:
        server-addr: 127.0.0.1:8848
        namespace: test

      config:
        server-addr: 127.0.0.1:8848
        file-extension: yml
        namespace: test
consumer:
server.port=8071
spring.profiles.active=dev

spring.application.name=service-consumer
spring.cloud.nacos.discovery.server-addr=127.0.0.1:8848
spring.cloud.nacos.config.namespace=test
相关阅读
评论:
↓ 广告开始-头部带绿为生活 ↓
↑ 广告结束-尾部支持多点击 ↑